Getting Started
Overview
VOR Stream is a system for creating and maintaining processes designed to solve financial risk problems. Key features of the system are:
- Batch-Stream oriented execution of a process - i.e., partial results available early - before the job finishes
- Parallel processing across threads, across machines, and across the workflow
- Each step (node) in the process is run independently of and in parallel with the other steps
- Each step can be written in a different language (Python, Golang, SAS, and SQL languages are currently supported)
- Documentation is autogenerated
Components
VOR Stream consists of the following:
- Data
- Input data
- Output data
- Scenarios
- Simulations
- Matrix maps
- Queues
- Inner-process communication
- Connections between nodes
- Nodes
- Nodes are working units in a process
- Nodes operate on queues or data residing on disk
- Nodes run completely independent of each other
- Nodes communicate with each other through queues
- Processes
- Processes can be made up of a collection of sub-processes or Nodes
- Processes can be reused in multiple processes
- A Process operates on Input Data and creates Output Data
Run Your First Process
Let's go through an example of how to create and run a process in your new VOR Stream installation!
Talk to your administrator to get the installation path, which will be used to set the PATH environment variable:
export PATH=$PATH:<install path>/bin
If this is your first time running VOR or if you haven't run in a while, you will need to create a security token:
vor create token
You will be prompted for a password if LDAP is enabled, otherwise a link will be displayed to authenticate with OAUTH. Specify your LDAP password or click on the link.
All execution and actions occur from a playpen. This could be your own personal space or a "Master" or "Production" space. A playpen is created using the vor create playpen command:
vor create playpen <name of directory to create or playpen path>
This will create a directory structure necessary to build and run VOR Stream nodes.
If you belong to more than one administration group, you may be prompted to select a group where your playpen will live:
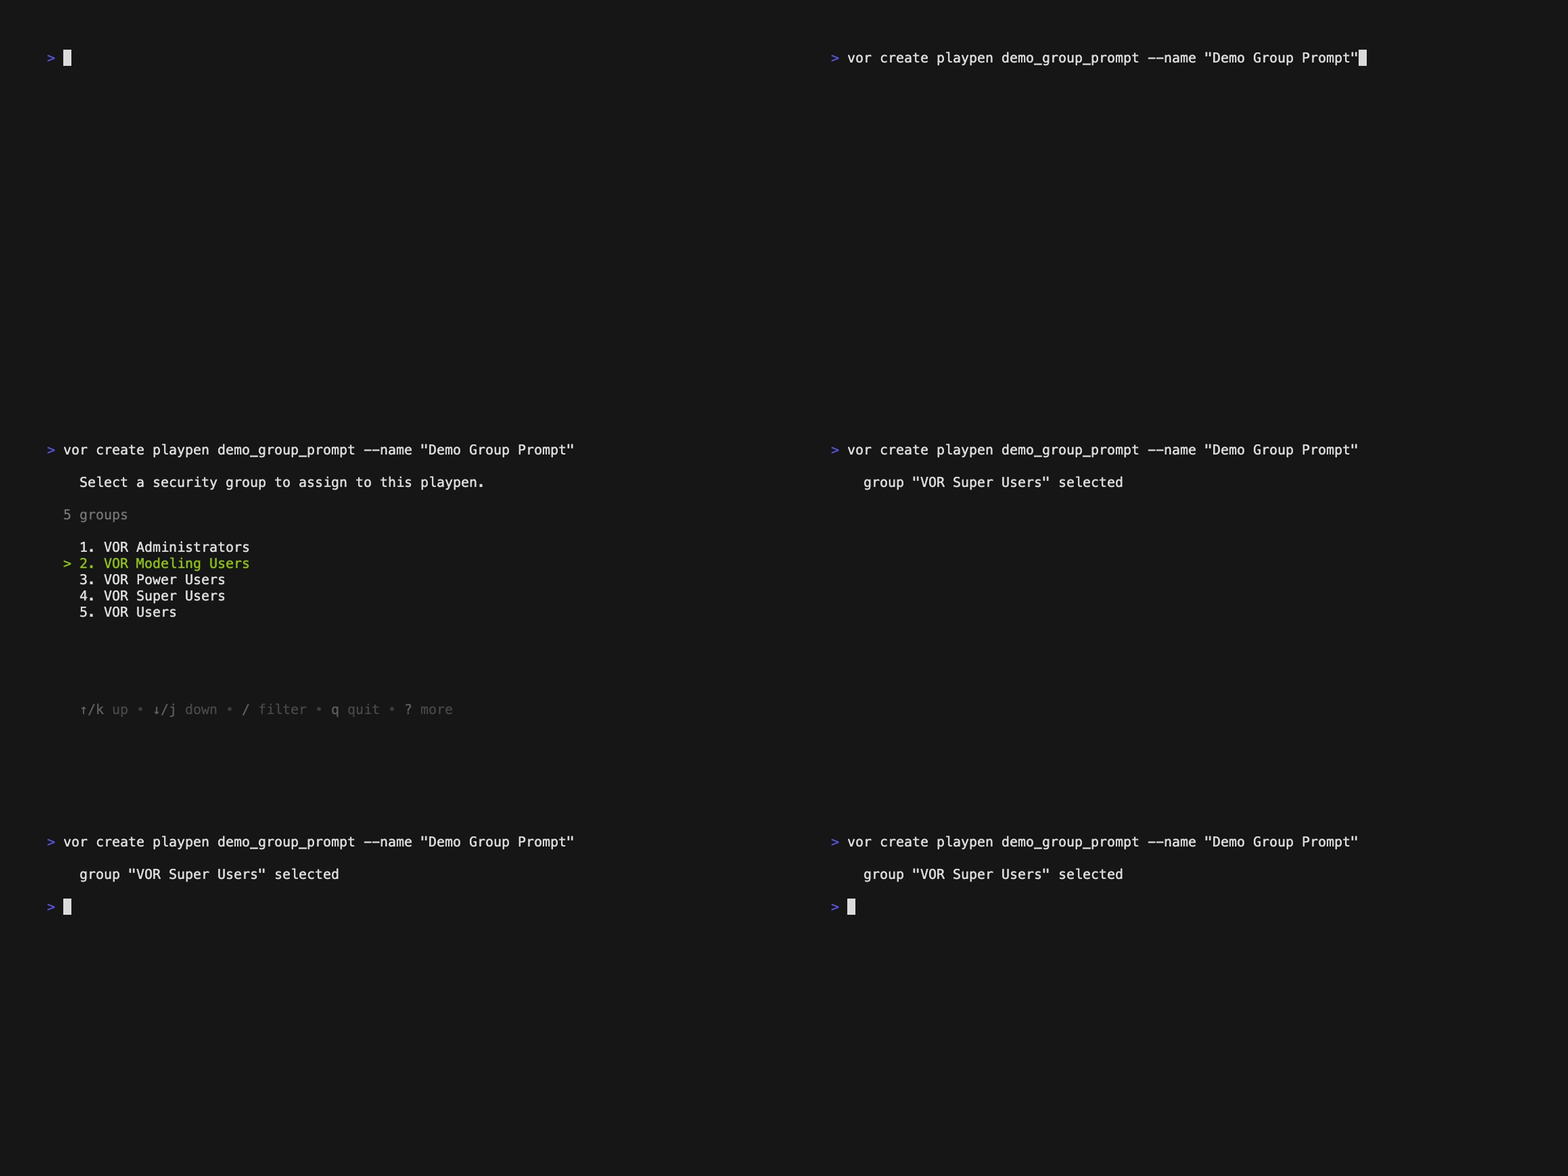
Alternately, you can specify the group on the playpen command:
vor create playpen --group "vor super users" <name of directory to create or playpen path>
A playpen can have a name and a description as well. The name and description
are visible in the UI and through the vor show playpen command. To add a
name and description to a playpen use the --name and --descr options on
the vor create playpen command:
vor create playpen --name mine --descr "This is a great playpen" <name of directory to create or playpen path>
To see all accessible playpens, run:
vor show playpen
To delete a playpen use the vor delete playpen command:
vor delete playpen <name of directory to create or playpen path>
Run Process
- Create a playpen.
- Look at the tables.csv file in the src directory.
- This file is a data description of the data in your processes. It is created with some sample tables.
- Notice that there is a description of data called input. It has fields named id, class1, class2, and value. The first three of these variables (i.e., id, class1, class2) are character variables and the variable value is a numeric floating-point value. These are the fields required from either the input file or a queue.
- There is also a declaration of data called output. Because output inherits from input, output will have the same columns as input in addition to a new numeric field named x.
-
Generate a sample input file with the
vor generatecommand. This file will be based on the input table in tables.csv and is created inside the input directory. By default, the file is named after the table, but we can opt to use a different name. Here, we will name itfirst.csv. For more information on the command refer tovor help generate.vor generate input --output first.csv -
Create a file called first.strm. In first.strm, input the following code:
// My first process name firstprocess // read from the input.csv file in first.csv -> input // create a computational node node usernode(input)(output) // write out the results out output -> output.csv -
Create a process using this command:
vor create process first.strm -
Now the process is ready to be run:
vor run firstprocess
The execution should be rapid, and a new directory should appear in the playpen's output directory called <processName>. In that directory there will be the resulting file output.csv. The log from running the process is printed to the terminal, as shown below. Each node will have its own log section.
INFO    Starting process firstprocess
INFO    Begin Node Log ------------------------       logFile=input_input_firstprocess.log
INFO [2023-02-03 07:39:11] The table "first" was located in /opt/vor/data/test/input/first.csv
INFO [2023-02-03 07:39:11] Final statistics:{"InternalJobID":1,"NodeName":"input_input_firstprocess-0@localhost","Stats":[{"statistic":"count","variable":"Observation Count","values":[100,100]},{"statistic":"duration","variable":"CPU Time","values":[0.00041853700000000013]},{"statistic":"rate","variable":"Node Throughput","values":[0]}],"status":"Finished"}

INFO    Begin Node Log ------------------------       logFile=output_output_firstprocess.log
INFO [2023-02-03 07:39:11] Final statistics:{"InternalJobID":1,"NodeName":"output_output_firstprocess-0@localhost","Stats":[{"statistic":"count","variable":"Observation Count","values":[100,100]},{"statistic":"duration","variable":"CPU Time","values":[0.00008997599999999998]},{"statistic":"rate","variable":"Node Throughput","values":[0.29944082077000506]}],"status":"Finished"}

INFO    Begin Node Log ------------------------       logFile=usernode.log
INFO [2023-02-03 07:39:11] Number of threads used by node usernode: 1
INFO [2023-02-03 07:39:11] Final statistics:{"InternalJobID":1,"NodeName":"usernode-0@localhost","Stats":[{"statistic":"count","variable":"Observation Count","values":[100,100]},{"statistic":"duration","variable":"CPU Time","values":[0.00018727499999999996]},{"statistic":"rate","variable":"Node Throughput","values":[0.5281579278699702]}],"status":"Finished"}
Make your First Process Useful
Upon initial execution, the first process is not very useful. The output indicates that the values for the new variable x are all NaNs (i.e., not a number) because x was not assigned a value by any node. First, to make it easy to test and develop the usernode, rerun the process and use the --test option:
vor run firstprocess --test usernode
This will create data in the test directory and make it easy to run the usernode by itself. There are other ways to create data (see Input Data).
In the newly created playpen, navigate to the src directory. Additionally, set the VOR_STREAM_PLAY environment variable since the default playpen setting is only available in the root of the playpen.
export VOR_STREAM_PLAY=<playpen path>
Now run this node using the following commands:
export GOPATH=$VOR_STREAM_PLAY
go install ./nodes/usernode
export PATH=$PATH:$VOR_STREAM_PLAY/bin
usernode -t
The following should be printed to the terminal:
2020/07/29 13:42:37 Number of threads used by node usernode: 1
2020/07/29 13:42:37 Sent to queue output {"X":"NaN","Value":86229,"Done__":false,"Class2":"Illinois","Id":"instid_1","Class1":"Chicago"}
2020/07/29 13:42:37 Sent to queue output {"X":"NaN","Value":14461,"Done__":false,"Class2":"Illinois","Id":"instid_2","Class1":"Chicago"}
2020/07/29 13:42:37 Sent to queue output {"X":"NaN","Value":161430,"Done__":false,"Class2":"Illinois","Id":"instid_3","Class1":"Chicago"}
2020/07/29 13:42:37 Sent to queue output {"X":"NaN","Value":118647,"Done__":false,"Class2":"New York","Id":"instid_4","Class1":"New York"}
…
*U.go File Structure
This is what the node is planning on sending the queue called output. An IDE
(Integrated Development Environment) is recommended to edit nodes - Visual
Studio Code will be used for the rest of this example. To add custom logic,
edit the file usernodeU.go in the src/nodes/usernode/ directory. It is not
recommended that the file usernode.go be edited as it will be written over
when vor create process is run again, but changes to usernodeU.go will be
preserved.
This is what a modified usernodeU.go looks like. The first 7 lines shown below are boilerplate items for the Golang language.
package main

import (
    "frg.com/streamr/frgutil"
    "queues/Input"
    "queues/Output"
)
The next set of lines shown below define an initial User structure. This
structure can be modified to pass information between the _init(), worker(),
and term() functions.
// User holds a node's per-thread state; add your own fields to it.
// There is one User per worker thread.
type User struct {
    hh        *frgutil.Handle // required - don't remove
    threadNum int             // required - don't remove
    options   map[string]map[string]map[string]any
    Output    *Output.Output
}
See _init() and term() functions below. The _init() function is for
operations that are done once per thread, before any other processing is
performed. The term() function, similarly, is called when the node ends for
each thread. For Golang, there are also initThreads() and termThreads()
functions. The initThreads() function is called once before any threads
are started, and termThreads() is called when all the threads complete.
// _init runs once per worker thread, before that thread's worker loop.
// The output queues are open.
func (u *User) _init() {
}

// term runs once per worker thread, after that thread's input drains. The
// output queues are still open, so a thread can emit its per-thread aggregate.
func (u *User) term() {
}
Edit the *U.go File
Focus on the worker() function - this is where most of the changes will be
made for Computational Nodes, as it is called for each observation of the input
data. See worker() function below.
// worker runs once per input observation. input is a struct whose fields are
// the input queue's columns, lowercased with the first letter capitalized
// (account_id becomes input.Account_id, myValue becomes input.Myvalue).
func (u *User) worker(input *Input.Input) {

    // You don't have to post to any output queues
    u.Output.X = 5
    Output.Post(u.Output)

    // update statistics
    u.ComputeStat("mean", "X", u.Output.X)
    // u.ComputeStat( "mean", "value", input.Value)
    // u.ComputeStat( "min", "value", input.Value)
    // u.ComputeStat( "max", "LoanAmt", input.LoanAmt)
    // u.ComputeStat( "topN", "otherValue", input.Other)
    // u.ComputeStat( "bottomN", "newValue", input.New)
}
On the last lines of the worker() function, the statistics for a node are
defined. These are the user-set statistics. The mean of x is the only
statistic that is active. The others are there for examples and are commented
out. These statistics (i.e., active ones) are available to view in the UI as the
process is running and after the process is finished.
Note
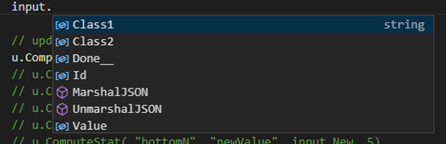
In an IDE, as you start typing, it will provide you with hints.
In the figure below, the IDE is showing the possible fields in the input.
The fields of interest are those with the blue leading icon. The same action
can be done to view the output fields by rather specifying for u.Output.
The standard convention for the field names includes a capitalized first
letter and lowercase for the remaining letters.
At the top of the worker() function, add the following.
u.Output.X = 5
Save the file, run go install, and rerun your test (like the following).
cd $VOR_STREAM_PLAY/src
export GOPATH=$VOR_STREAM_PLAY
go install ./nodes/usernode
usernode -t
Alternatively:
vor create process first.strm
usernode -t
You should see the x is now set to 5.
VOR Stream and Version Control Systems
VOR Stream is designed to work with version control systems. Specifically, the src directory should be the target of version control.
Golang
If you are using Golang computational nodes, and you are adding import packages, you should use the Golang module features which will automatically track and add dependencies. If vendoring is enabled and the vendor directory is present in the src directory, then the vendor directory should be added to the .gitignore file.
Python
VOR Stream ships with a shared Python virtual environment at
/opt/vor/venv that provides the runtime and a common set of modules.
Note
The examples below assume the default installation path /opt/vor.
If your deployment installs VOR elsewhere, substitute your install
path for /opt/vor throughout.
To install additional modules for a single playpen, create a playpen-local
virtual environment at <playpen>/venv that inherits from the shared one.
Run the following steps from the playpen root.
First, create the playpen venv using the shared VOR Python so the Python version always matches the installed runtime:
/opt/vor/venv/bin/python -m venv venv
Next, append the shared venv's site-packages to the playpen venv's
sys.path so shared modules (including pylint) remain importable. The
playpen site-packages is listed first, so any package installed locally
takes precedence over the shared copy:
child_site=$(venv/bin/python -c "import site; print(site.getsitepackages()[0])")
parent_site=$(/opt/vor/venv/bin/python -c "import site; print(site.getsitepackages()[0])")
printf '%s\n' "$parent_site" > "$child_site/parent.pth"
The .pth filename is arbitrary; any *.pth file in site-packages is
processed at interpreter startup, so older setups using base_venv.pth
continue to work without change. If you upgraded VOR across a Python
minor version (for example, from 3.9 to 3.11), verify any existing
base_venv.pth still points at the current
/opt/vor/venv/lib/pythonX.Y/site-packages: a stale entry from the
previous Python version is silently ignored, so shared modules will
stop resolving until the file is updated.
Finally, install any additional modules into the playpen venv:
venv/bin/pip install <additional modules>
To override a module that already exists in the shared venv with a local
build, pass --ignore-installed so pip installs it into the playpen venv
instead of skipping it as already satisfied:
venv/bin/pip install --ignore-installed <package-or-wheel>
When a playpen venv exists, VOR Stream runs pylint and Python nodes through its interpreter automatically, so any packages installed here are resolvable both at build time (pylint import checks) and at run time.
For more details on how to use Python in VOR Stream, please see the Python User Code Basics section.